I wrote a guide for the software side of things. The schematic is to follow.
I have tested this as a run through yesterday on a Pi 3B+ and had previously tested this on a Pi Zero and ZeroW. It assumes a little linux/raspberry pi knowledge but still should cover most of the basics.
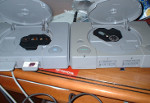
Catflap works perfectly. With the schematic I will post code upload is fast, but I am sure its slower the gregs xlinkusb. Ill get some speed tests up soon. Other functions in catflap seemed to work other than the console mode :- i tested a gameboy emulator and psxbasic , pccdrv: redirection and stdio input over the console didnt work. Output seemed to work fine though.
I will keep revising this guide as well as the schematic and link to the current in the first post.
Raspberry Pi Setup For GPIO Parallel Port/Catflap4linux
Step 1 - Basics
Get and write the latest Raspbian image to an SD card - any new version works (
http://raspberrypi.org/), I have used on both Stretch Lite and Stretch with Desktop. Then you can connect to your Pi using SSH or just using a terminal on the Pi. I won’t cover the basics such as network setup as its covered pretty well elsewhere.
Be aware that by default Raspbian doesn’t allow access to SSH unless you enable it. The easiest way is to create a file in the FAT partition (or boot folder) called ‘ssh’. This will then enable it.
Step 2 – Initial Config
Once you are sorted and logged into a terminal you need to make sure of some settings. We can do this through raspi-config. This is pretty standard stuff but will cover it here just in case.
Firstly, go into the submenu Interfacing Options and disable automatic loading of both SPI and I2C interfaces.
Next, go into Advanced Options and select expand filesystem.
Whilst here you are in raspi-config, you may as well check everything else – WiFi region etc. Once you have finished go back and then save and exit. When prompted to reboot answer yes.
Step 3 – Updating & Required Packages
As we are building kernel modules from source, we need to ensure that Raspbian is up to date.
Enter the following to do this:-
Code: Select all
$ sudo apt update && sudo apt upgrade
Answer yes when prompted.
Once completed we can then install the Linux kernel headers and Git
Code: Select all
$ sudo apt install raspberrypi-kernel-headers git
Once apt has finished getting the two packages we can start to grab the sources we need. We are going to get the pi-parport code and also the catflap4linux code. To do this enter the following:-
Code: Select all
$ git clone https://github.com/garlick/pi-parport.git
and
Code: Select all
$ git clone https://github.com/hkzlab/catflap4linux.git
Once completed you should have two folders in your home directory : catflap4linux and pi-parport.
Step 4 – Compiling the Device Tree Overlay
Build the device tree overlay.
The files are now copied to the overlays folder in the /boot partition. To ensure the overlay is loaded on boot, add it to the config:-
Then scroll to the bottom of the file and add the line :-
Save and exit nano (press CTRL+O followed by CTRL+X) and reboot.
Once rebooted, log back in.
Step 5 - Building The Kernel Modules
Go into the driver folder and then compile the kernel modules.
If everything compiled successfully you should now have 4 kernel modules in the driver folder lp,parport,parport_gpio and ppdev .
The module 'lp' is not required, it's a line printer driver which we will not be using. The three required modules can be tested with insmod.
And check they have loaded successfully.
Output should be something like:-
Code: Select all
[    2.533826] parport: loading out-of-tree module taints kernel.
[    2.539911] parport0: data on gpio pins [22,23,24,10,25,9,8,11]
[    2.539924] parport0: status on gpio pins [18,17,4,3,2]
[    2.539942] parport0: control on gpio pins [26,19,6,13]
[    2.539946] parport0: hd on gpio pin 20
[    2.539950] parport0: dir on gpio pin 21
Firstly, make a folder for the modules. To ensure they are in the matching folder for the kernel we are running, use the following command:-
Code: Select all
$ sudo mkdir /lib/modules/$(uname -r)/ppdev
Secondly, copy the modules to the folder we just created:-
Code: Select all
$ cp *.ko /lib/modules/$(uname -r)/ppdev
Run depmod so they can be detected:-
We want the modules to load on boot, so we need to add them to /etc/modules.
Add the three modules to the end of the file, one on each line, eg:
Code: Select all
# /etc/modules: kernel modules to load at boot time.
#
# This file contains the names of kernel modules that should be loaded
# at boot time, one per line. Lines beginning with "#" are ignored.

parport
parport_gpio
ppdev
If still present, you can remove or comment out both i2c-dev and spi-dev if they are as we don’t need them.
Save and exit (press CTRL+O then CTRL+X). Then reboot again:-
Step 7 – Check and Set Permissions For /dev/parport0
Once Rebooted check the modules have loaded.
See the same lines from earlier? That means everything has loaded correctly. The last bit is to add the user ‘pi’ to the group ‘lp’. This means the parport0 device can be accessed without using sudo. If your username differs, substitute ‘pi’ for your login.
To see the changes to the group, logout and back in again:-
Step 8 – Compiling Catflap4linux
Login again after rebooting. Build the catflap4linux sources :-
Stick the compiled binary into a folder :-
Now, lets test the access to the parport0 device and catflap:-
If you haven’t yet built the adapter, catflap will eventually timeout. If you are lazy just press CTRL+C to exit. Otherwise, the PSX should reset and the output will be like below. If so, all done

.
Code: Select all
pi@raspberrypi:~ $ catflap reset

+------------------------------------------------------------+-------+
| CatFlap for Linux           (Control for PSX & Caetla ROM) | v0.01 |
+------------------------------------------------------------+-------+

Internal CCaetla Class version 2.36
Initializing Caetla...
Initializing device /dev/parport0 ...
Resetting PSX...
Schematic is currently separate – currently using some hacky bidirectional level shifters, but they work well. Also, the strobe signal is omitted as its not required. I would recommend visiting the pi-parport github if you want to do a full parallel port.
Credits
- Jim Garlick – Amazing work on building a parallel port for the Raspberry Pi. Please visit his github for the source and the PCB files. He has two versions on his site which are designed to give you a complete parallel port that will drive printers etc. https://github.com/garlick/pi-parport
- Fabio Battaglia – For porting over catflap to linux using ppdev. https://github.com/hkzlab
- Intar Technologies – No idea who they are or were, but thanks for the original version of Catflap!


 .
.


 , "PlayStation",
  ,
,  , "DUALSHOCK", "Net Yaroze" and "PSone" are registered trademarks of Sony Computer Entertainment Inc.